Glass Block Windows
Glass block windows are considered as an ideal alternative for traditional pane windows. They are best suited for basement and first floor windows since they provide that extra security to thieves as compared to any normal window.
Although breaking through a glass block windows is possible with the use of a sledgehammer, it is quite impossible for a thief to actually attempt to do it.
Glass block windows appear solid, but those used in residential purposes are hollow. This type of window improves insulation level since a slight vacuum is produced inside. This happens once the two halves of the glass block, which are fused together by means of pressure and heat, cool down. Glass block windows are capable of doubling the insulation value a single pane window provides.
Furthermore, glass block windows are ideal in terms of energy savings. This is because glass block windows are capable of reducing air infiltration since they are as airtight like an actual wall. There are also solid glass blocks of commercial quality which available in the market. These types of glass blocks are meant for high security purposes, however they are expensive and considerably heavy.
While there are plastic block halves available, they are not as effective as actual glass block halves in terms of energy efficiency. Plastic block halves are not fused with heat since they are made from acrylic. The most efficient ones in terms of energy savings are those which contain a thin layer of metal atoms on the inner surface. This feature allows them to have an efficient low-emissive property which is responsible in year round energy savings.
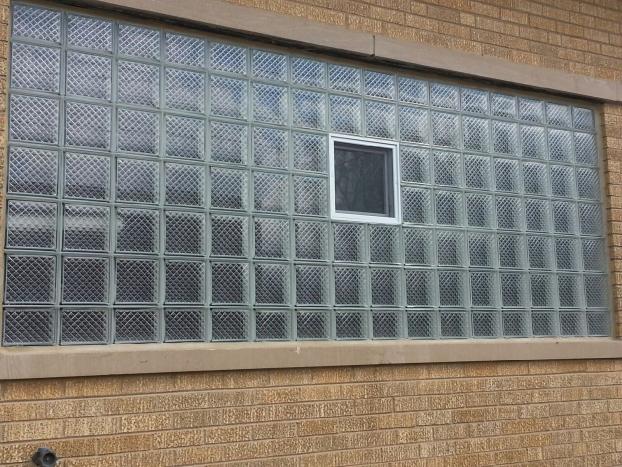
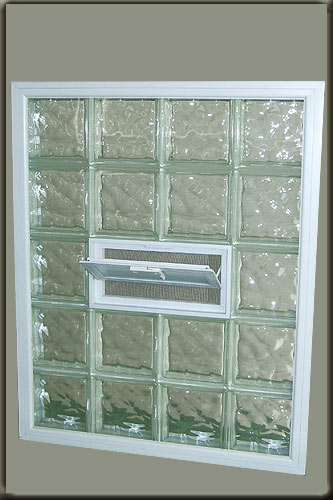
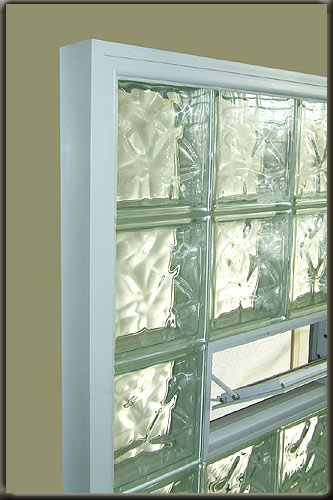
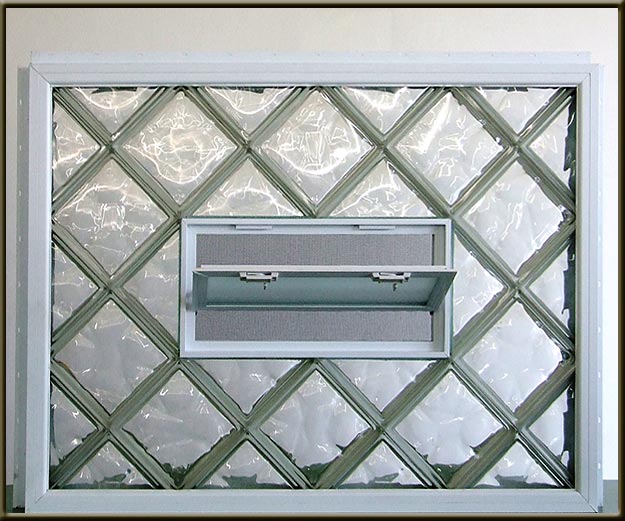
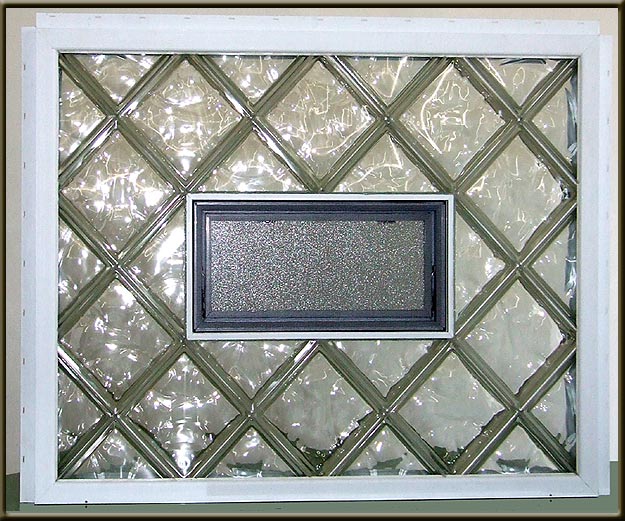
Glass block windows can provide natural ventilation similar to any traditional window. This is because like any typical window, they can be opened through various ways or options. One option is by replacing several blocks with a small hopper-style window which can be opened. This does not lessen the security purpose of glass block windows since the opening is actually too small for a person to crawl through. In addition to that, the clear panel is in fact made of polycarbonate bulletproof glass.


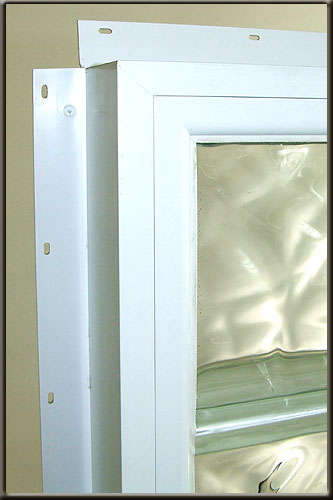
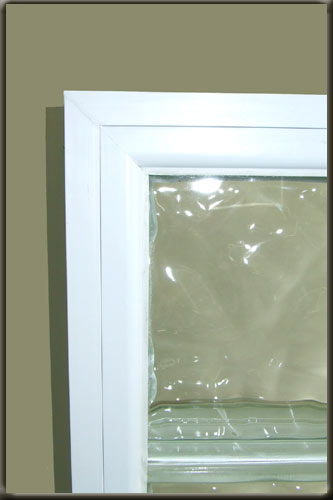
VINYL WRAP FOR NEW CONSTRUCTION
- Custom vinyl frame with welded corners
- Vinyl seal – prevents water and air infiltration
- Interior stop secures glass block panel in place
- Pre-drilled nailing flange makes it easy to install
- All block are silicone sealed
- Avaliable in:
– thin line 3 1/8” glass block
– variety of 5 exterior colors:
almond, bronze, cocoa, forest green and white
- Required rough opening: add 1 3/4” to nominal Glass Block Panel size
- Example: 32” x 32” nominal window requires a framed opening of
33 3/4” x 33 3/4” VINYL WRAP — USED AS A REPLACEMENT WINDOW
-
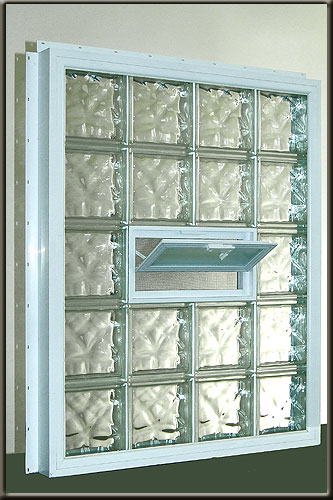
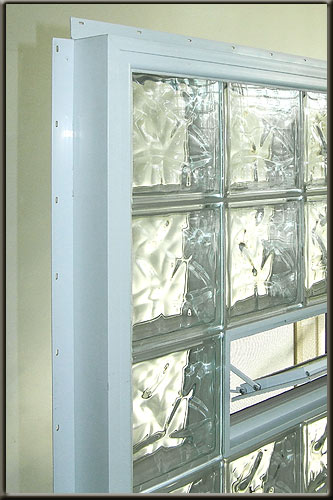
A heavy gage vinyl frame wraps around this unique style of glass block. It is designed to fit in new construction projects, as well as fitting into your new remodeling job. It can be used for bathrooms, partition walls, basement windows, entryways, and much more. This vinyl frame matches your existing vinyl windows perfectly, and it adds elegance and a modern appearance to your home.
By developing this unique style of glass block, Glass Block Factory has placed itself at the forefront of the industry. Please check with us often, as we are constantly working with new ideas, and are developing new innovative and exciting products.
SOME GENERAL INFORMATION BEFORE YOU BEGIN
The installation recommendations presented here are for replacing bath, kitchen, basement, and other residential windows. Each application will vary slightly, and your local supplier can assist you with any questions or variables.
Glass block panels are nonloadbearing, so at the top of the window opening there must be a lintle (load-bearing wood or metal supporting member).
TOOLS & MATERIALS YOU WILL NEED
All the tools and materials, with one or two exceptions, are found in the average home:
Hammer, chisel, crowbar, trowel, premixed glass block mortar, level, hacksaw or wood saw, striking tool (for finishing mortar joints), caulking gun, clear or colored caulk, wood or aluminium molding(s), expansion strip material, gloves
For positioning in masonry openings, you’ll need wood wedges – 3 -1/2” long, tapered from 1 – 1/2” to 0” in height. To hold the panel in place in wood frames, you’ll need wood shims. And, for reducing oversize openings in wood frames, you’ll need lenghts of 1” x 4” or 2” x 4” lumber (See Fig. A).
MASONRY
STEP 1. Measure Opening
Before ordering a glass block panel, carefully measure the opening from the outside of the house. Measure the full width of the masonry opening, as if the existing frame were already removed. Measure the height of the opening from the top of the foundation wall (at the sill bottom) up to the wood or steel supporting member. This height dimension should include the sill thickness. Most sills, especially sloped ones, are removable.
To be sure, tap it – if it sounds hollow, it should come off easily when you are ready to install the new window. If the sill appears permanent, take the height dimension from sill top
(See Fig. 1).
The window opening should be a minimum of 3/8” to 1/2” greater in both height and width than the glass block panel. When ordering prefabricated glass block panels, be sure to specify “opening size”. Your local retailer or fabricator will recommend the size which best fits your opening.
STEP 2. Remove Old Window
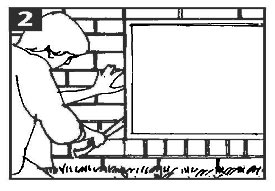
You’ve made your preparations and the glass block panel is at hand. Now you’re ready to start the actual work by removing the old window. First, working from the inside, take the movable part of the window out of the frame. Then, from the outside, pry the bottom of the frame away from the sill by using a crowbar at the middle of the frame bottom (place a piece of scrap wood under the crowbar to protect the masonry). Using a hacksaw, cut the bottom of the metal frame where necessary to remove it.
Repeat this procedure at the sides and top of the frame (See Fig. 2).
STEP 3. Set the panel
Prepare a mortar mix stiff enough to prevent slumping. Freshly mixed mortar may cause skin irritation. Avoid direct contact where possible and wash exposed skin areas promptly with water. If any gets into eyes, rise immediately with water and seek prompt medical attention.
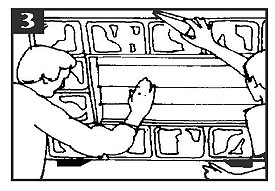
Working from outside, place a wood wedge toward each end of the sill and trowel on a smooth, flat “bed” of mortar on the foundation/sill. Set the glass block panel on top. Vertically center the panel by adjusting the wedges in and out. Place a third wedge between the top of the glass block panel and the top supporting member in order to secure the centered panel (See Fig. 3).
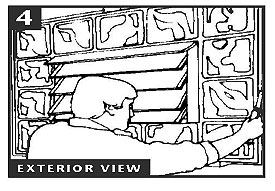
If panel adjustment creates voids in the mortar (inside or outside), additional mortar should be applied with the trowel and a striking (tucking) tool (See Fig. 4).
Use your level to make sure your glass block window is level and plumb, horizontally and vertically. Your opening may be out of square, so adjust the panel position for best appearance.
STEP 4. Secure the Panel
Using a trowel and striking (tucking) tool, push mortar into openings on the sides and bottom of the panel until all voids are filled completely (See Fig. 4). Do not put mortar into the opening. Mortar both the inside and outside of the window. When mortar begins to set, remove the wood wedges and fill the wedge holes on the sides and bottom with mortar. Clean excess mortar off the glass block with a damp cloth.
Fill the top opening with expansion strip material. Then, caulk this joint on both the inside and outside to provide a positive seal and assure that no weight bears on the glass block panel.
WOOD FRAME
STEP 1. Measure Opening
Before ordering a glass block panel, carefully measure the opening from the outside of the house.
Measure the width of the opening from the wood jamb or the aluminium siding covering the wood. Measure the height of the opening from the top of the sill up to the header (See Fig. 5).
The window opening should be a minimum of 3/8” to 1/2” greater in both height and width than the glass block panel. When ordering prefabricated glass block panels, be sure to specify “opening size”. Your local retailer or fabricator will recommend the size which best fits your opening.
STEP 2. Remove Old Window
You’ve made your preparations and the glass block panel is at hand. Now you’re ready to start the actual work by tearing out the old window.
First, working from the inside, take the movable part of the window out of the frame. From the outside, pry the bottom of the metal frame away from sill using a crowbar (place a piece of scrap wood under the crowbar to protect wood or aluminium siding). With a hacksaw, cut the bottom of the metal frame where necessary to remove it. Repeat this procedure at the sides and top of the frame (See Fig. 6).
If your window has a wood frame, and it’s in good condition, you may leave it in place with just the sash removed.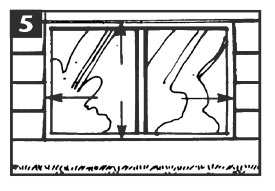

STEP 3. Set the panel
It may be necessary to adjust the window opening to the proper size by cutting or chiseling out some of the surrounding frame if the opening is too small or by adding 1” x 4” or 2” x 4” lumber at sides or top if it is too large. To assure longevity, use pressuretreated lumber or prime and paint wood surfaces.
Fasten a wood or metal stop molding around the inside of the window frame. Working from the outside, place the glass block panel into the opening and shim where necessary to hold the panel firmly in place. Trim the shims flush with the face of the panel (See Fig. 7).
Prepare a mortar mix stiff enough to prevent slumping. Freshly mixed mortar may cause skin irritation. Avoid direct contact where possible and wash exposed skin areas promptly with water. If any gets into eyes, rinse immediately with water and seek prompt medical attention.
Working from the outside, use a trowel and the striking tool to push mortar into the opening at the bottom of the panel up to the stop. Then, still from the outside, fill the side openings to the stop to prevent air leakage. Provide expansion strip material at the top and then seal with caulking.
STEP 4. Secure the Panel
When the mortar has set, fasten wood or metal stop molding around the outside of the window frame.
Caulk the outside molding at sides, top and bottom to ensure a complete weather seal
(See Fig. 8).
You may also desire to cover wood surfaces exposed to exterior weathering with aluminium to assure a positive seal and ease of maintenance.